


How to create successful Showit site
March 2, 2024
If you’re reading this, there’s a good chance you’re a creative business entrepreneur or a business provider in need of a professional-looking website as quickly as possible, most importantly, one that converts effectively. Is there’s a secret sauce to do that? Well yes. This guide will walk you through the key steps involved in building an effective Showit site that accomplishes your goals.
To create this kind of high-performing, strategically-designed Showit site, you’ll need to: determine your goals, organize your content, select a visually appealing template, customize it, launch and promote! Follow the steps in this guide to build your Showit site the right way.
1. Dream big: determine your goals
Before creating your Showit site, it’s important to determine your goals and who you want to reach. This will guide many of your decisions as you build out the site.
Start by clearly defining your target audience. Get specific on the demographics, interests, and needs of who you want to attract. Your content, design choices, and promotion strategy should all align with appealing to this audience.
Next, identify the main purpose and objectives for the site. Common goals include:
- Generating leads or sales for a business
- Promoting a brand
- Selling products or services
- Sharing knowledge or educating visitors
- Building an audience or community
With clear goals and target audience defined, you can make strategic choices in your site setup and execution to support achieving your desired outcomes. Revisiting your goals often helps keep your site development and content creation focused.
2. Prepare a copy and organize your content.
The key to a successful Showit site is having quality content that engages visitors and provides value. Without useful content, even the best designed site will fail to achieve its goals.
Focus on creating content that serves your audience’s needs. Provide helpful information they can’t find elsewhere. Prepare text, images, infographics, and videos to communicate and illustrate your message.
To begin with, start by defining your brand’s voice and tone. This will set the foundation for all of your website copy. Consider what kind of impression you want to make on visitors – whether it’s professional, friendly, authoritative, or something else entirely.
You can create a copy by using my free ‘Launch a Dream Website’ workbook or by hiring a good copywriter. There are also many copy workbooks available in the market. Don’t forget to utilize AI tools for additional help.

Additionally, keep in mind that website copy should be concise yet informative. Use clear headings and subheadings to break up text into easily digestible sections. Utilize bullet points or numbered lists when appropriate to present information in a more organized manner.
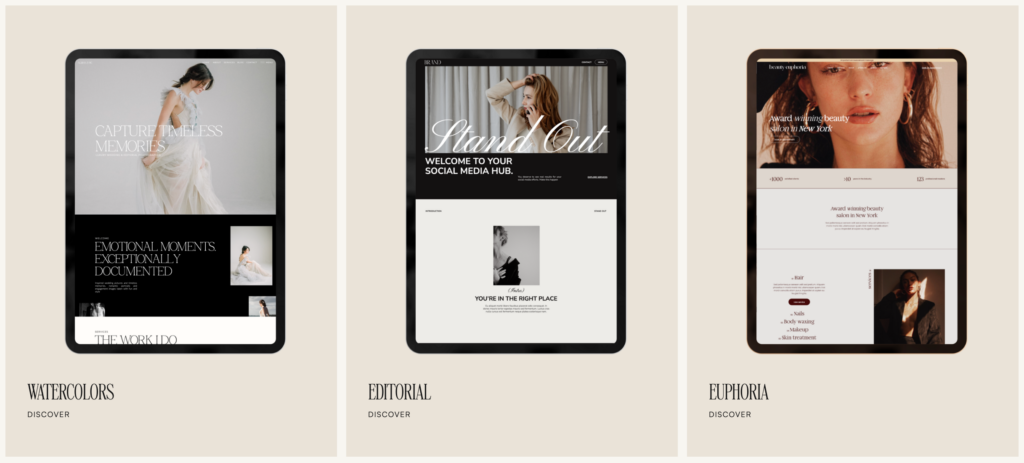
3. Choose your Showit template
Designing a website is a complex process that can be challenging, especially if you’re starting from scratch.
Rather than attempting to design a website from scratch, I recommend using professional templates that have already been created by experts. These templates are easily customizable and already strategically structured. And you don’t have to think about layouts and compositions.
Using templates can save you a lot of time compared to designing your website from scratch. So yes, I highly recommend to use templates. Showit have a free templates to start with. There’s also sooooo many beautiful templates on the market with variable prices. Check the blog post how to choose Showit template here.
If you are a business coach, photographer, or a marketing agency, check out our Digital & Chic Template Shop. You might find templates that match your aesthetic.
4. Customize your template
Now it’s time to incorporate all copy and content you collected and created before in your new website.
I tried so many platforms and by far Showit is the easiest when it’s comes to design and customization. Even for non tech-savy people it’s easy to figurate how to swap the photos, upload your fonts and etc…
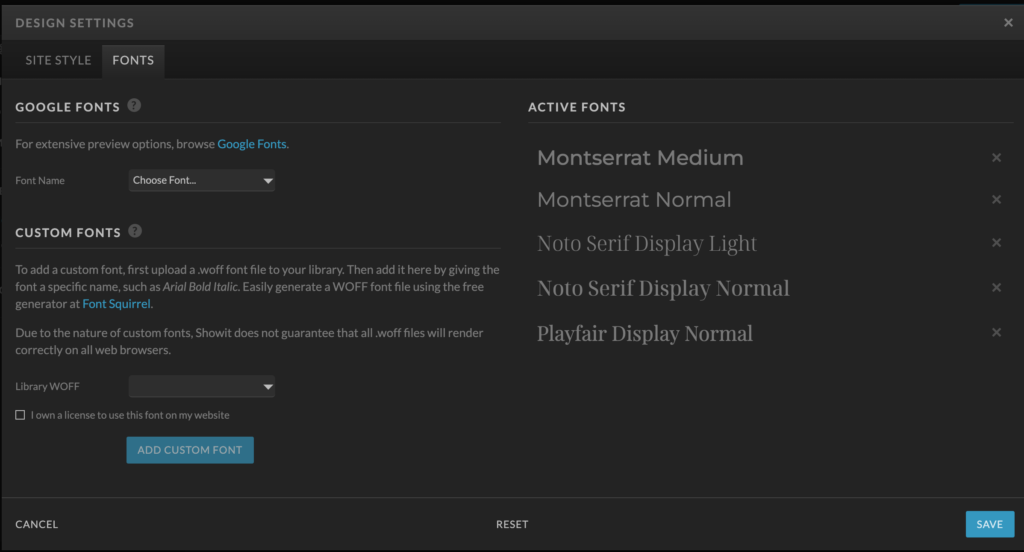
To customize Showit template start with:
- Upload fonts. You can upload your branding fonts to media folder in WOFF format. If your fonts in different format there’s be a link in Site settings that leads to fontsquirrel.com. It’s a Webfont Generator that will convert a font to WOFF file. Or you can use Google fonts
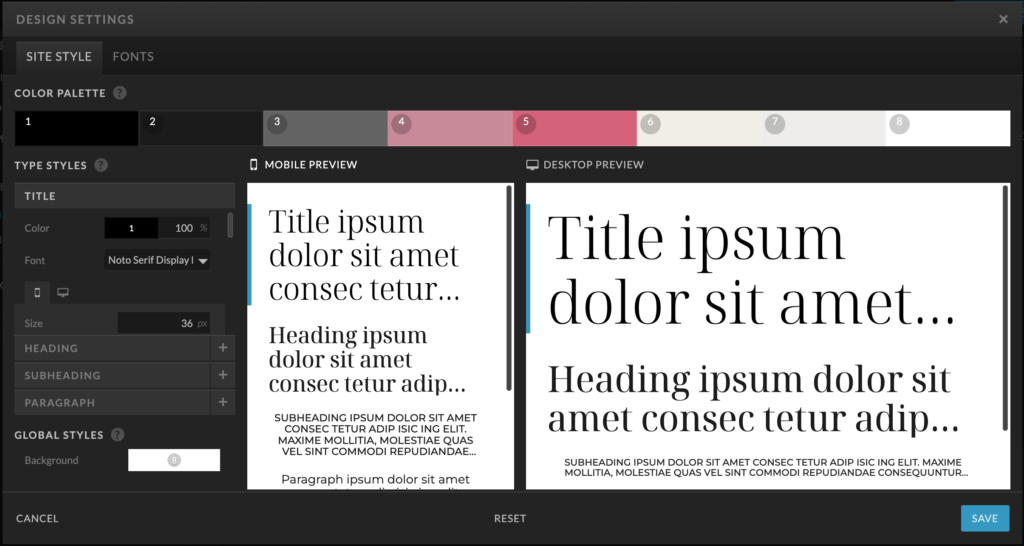
- Add a site style in DESIGN SETTINGS. Add your branding colors. Replace fonts with the new uploaded ones in Type Styles.
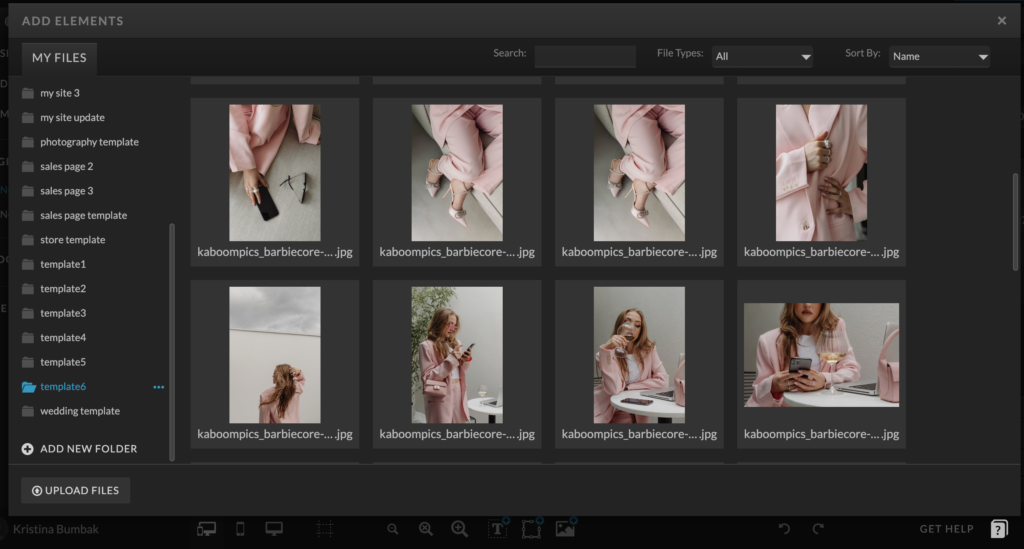
- Upload your photos in Media library and swap all the photos with your branding ones. The other cool background photos and textures you can find on websites like Unsplash or Pexels
- Add your copy. Just click on the text layers and replace with yours
- Add or replace canvases based on your content and copy
- Check all the links and menu.
- Test. Don’t forget to test everything. Click Publish and see preview.
5. Launch
After customizing your template, it’s time to launch your website. To do this on Showit, you need:
- Buy a Showit subsription
- Buy a domain name and connect it to Showit
- Make sure your site have SSL certificate
This might be the most tech-savvy part, but you’ve got this!
A domain is a web address that people type into their web browser to access a website.
Top Domains Registrars. There are several domain registrars you may want to consider. Some of the top domain registrars:
- Google Domains,
- GoDaddy,
- BlueHost
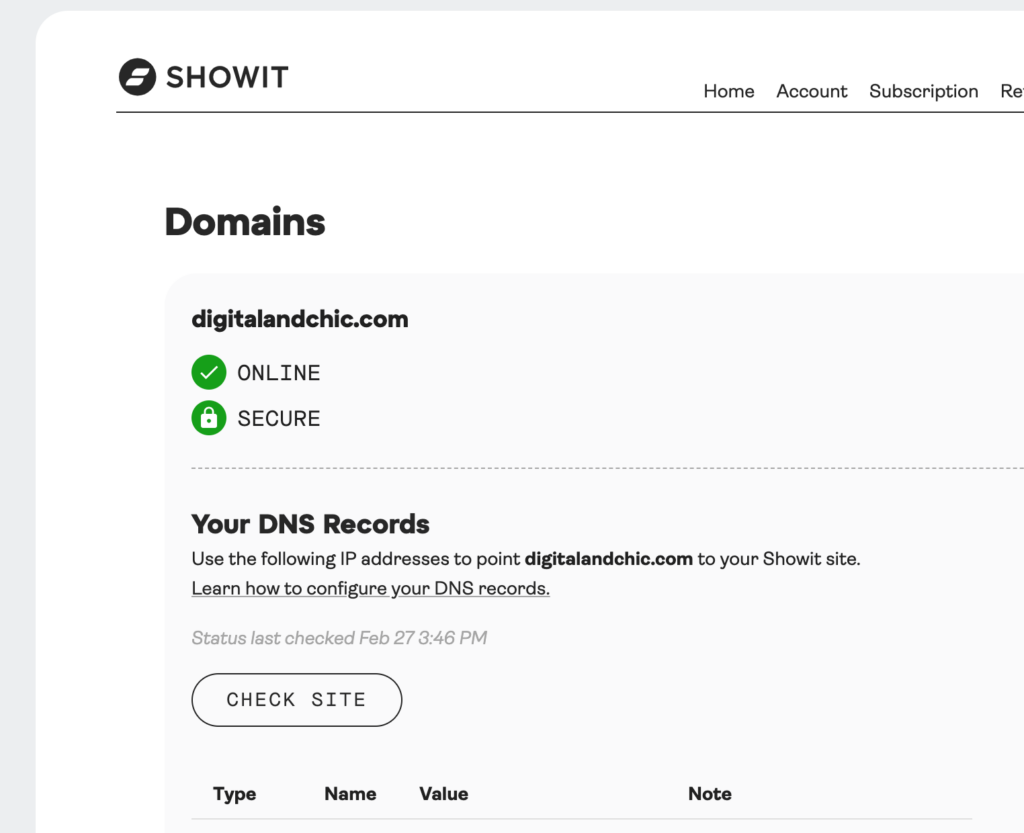
After you get custom domain connect it to Showit. You can do so by clicking on the Connect Your Domain option in the top left corner of the Design App. Once you have connected your domain to Showit, it’s time to set your DNS records. While it might sound complicated for those who aren’t tech-savvy, it’s actually easier than it seems.
To configure you DNS, login in Showit Account and click on domains tab. Click Configure DNS button that will automatically set up DNS for you. If there’s no such button please contact Showit support team (they’re not bites) or connect manually. A good instruction from Showit how to connect domain and configure DNS is here.
After you connected domain wait up to 48 hours to see if SSL certficate are automatically added to your website. If it’s not… yes, contact Showit support team.
SSL stands for Secure Sockets Layer, a security protocol that creates an encrypted link between a web server and a web browser.
In other words it’s a little lock before website name, that’s indicate your website is safe. Must have for every website.
6. Promote Your Site
After website is published game is not over. Driving traffic to your new Showit site is crucial for its success. Effective promotion will get your site in front of your target audience and build awareness of your brand. Consider leveraging the following strategies:
Search Engine Optimization (SEO)
- Research relevant keywords that prospects are searching for related to your products/services. Include these keywords (in a natural way) throughout your site copy. This will help search engines understand your content and rank you higher in results for those terms.
- Write blog posts and long-form content related to your industry. Unique, high-quality content will attract backlinks and improve your domain authority over time.
- Use Meta description to every image on website
Social Media
- Promote your new site launch on your brand’s social media accounts. Share blog posts, images, and other site content to drive traffic.
Email Marketing
- Send emails to your subscriber list announcing your new website and highlighting key pages/content.
- Include links to your site in all brand email newsletters, promotions, etc.
- Offer an incentive for subscribers to sign up on your site, like a discount code or free resource.
With an optimization and promotion strategy leveraging SEO, social media, email you can maximize exposure for your new Showit site, drive more high-quality traffic, and ultimately boost conversions.
Conclusion.
To wrap it up, creating a successful Showit site boils down to a few key steps. Firstly, clearly determine your goals for the website. Next, organize your content in a way that resonates with your audience. Then, choose a suitable template that aligns with your brand and vision. Customize it to make it unique and truly yours. Finally, launch your site and promote it to drive traffic and engagement.
Remember, when building a website for your small business on Showit, keep these steps in mind to ensure you create a visually appealing and effective online presence that helps you achieve your business objectives.

exlpore mroe
Resources
take a look
Find a collection of my favorite tools, resources, and products for your business! From free Showit templates to websites tips. Explore and enjoy!
")
templates shop
shop templates
Easy to use Showit website templates are the perfect option if you are on a tight budget, on a short timeline, or want to customize a website on your own

work with me
work 1:1
With our website design template customization service, you can have a stunning and fully personalized website without the hassle of doing it yourself.
")