


How to switch from Squarespace to Showit
May 22, 2024
Are you feeling restricted by your current website builder? If you’re considering switching from Squarespace to Showit, congratulations! Many entrepreneurs and creatives are finding that transitioning from Squarespace to Showit opens up a world of possibilities for their online presence. In this blog post, I’ll guide you on how to make transferring easy and seamless.
Why Make the Switch?
Don’t get me started on it. In every designer’s or studio’s blog, you can find reasons why one platform is better than the other. As you’ve noticed, I’m on Team Showit. I don’t see Squarespace as a bad platform; I just find Showit more intuitive with its drag-and-drop interface and more customizable with all the third-party integrations, not to mention WordPress blogging.
Steps to switching from Squarespace to Showit
Follow these steps. I think they’re quite easy. Unfortunately, there’s no magic button that will recreate your old website and transfer it to Showit. But at the same time, it’s a good thing because we can get a brand new website, good SEO, and keep the domain so you don’t lose your clients and visitors.
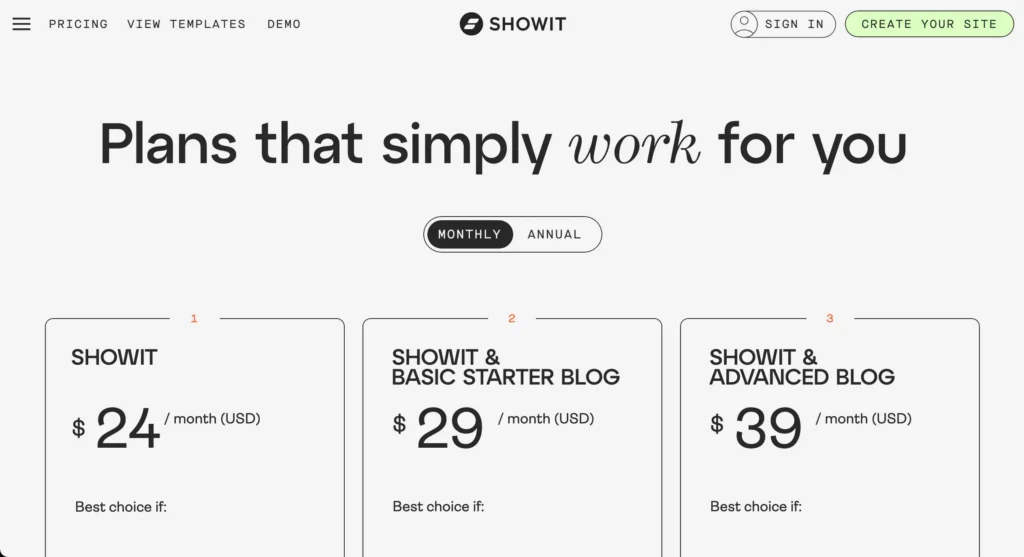
1) Sign Up for Showit
First, you need a Showit account. To get one free month of Showit, use this link (affiliate link, by the way). Get familiar with the platform to see if this is a good fit for you. There’s a free 14-day trial and three pricing plans. I personally recommend using the SHOWIT plan if you have a small 4-5 page website, and the SHOWIT & BASIC STARTER BLOG plan if you’re planning to add a blog. Having a blog is highly recommended for growing your brand and is super good for SEO!
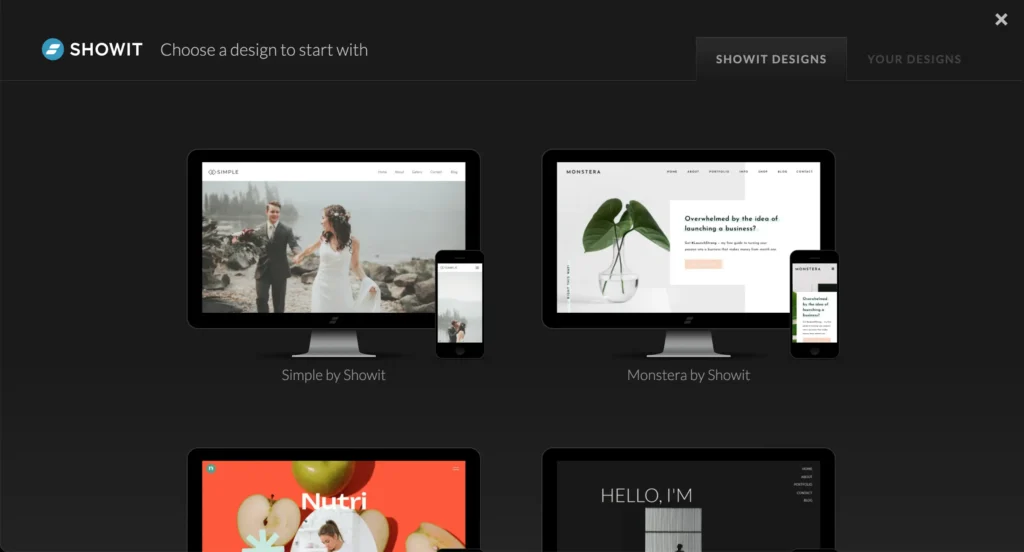
2) Choose a Showit Template
There are so many good Showit templates, so why design from scratch? From free to any price range, for any types of businesses: wedding photographers, coaches, marketing agencies, social media managers, and other creatives and entrepreneurs. You can find templates on the official Showit shop, marketplaces like Etsy, and of course… here!
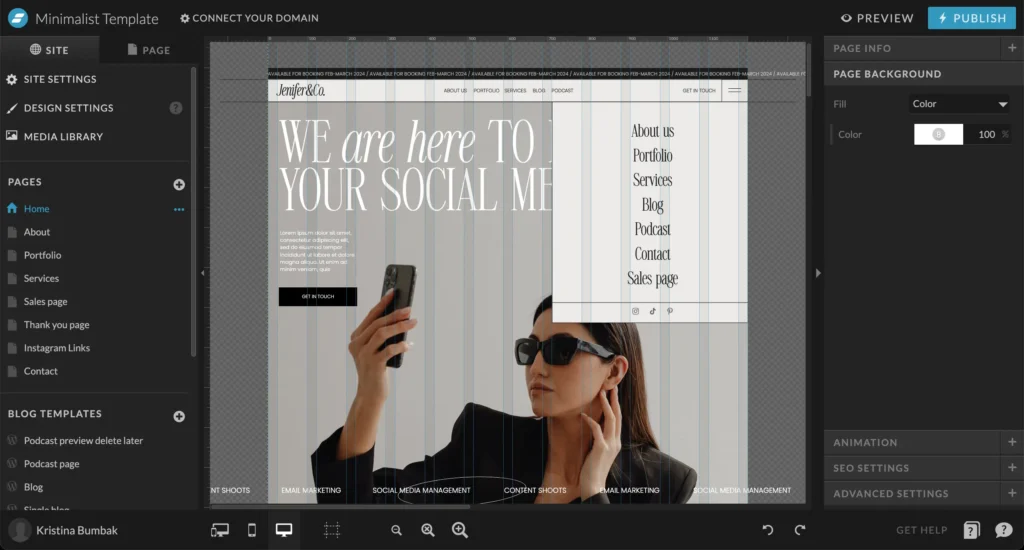
3) Customize Your Design and import your content
Once you’ve selected a template, it’s time to import your content from Squarespace. Showit makes this process easy with its built-in import tool. Simply follow the prompts to transfer your text, images, and other media files to your new site. I have a blog post showing how the customization process looks. Remember, it’s a drag-and-drop builder, so you can start by adjusting design style settings such as fonts and colors, easily switch images, and add or delete sections. Take your time and let your creativity flow!
4) Optimize Showit site for SEO
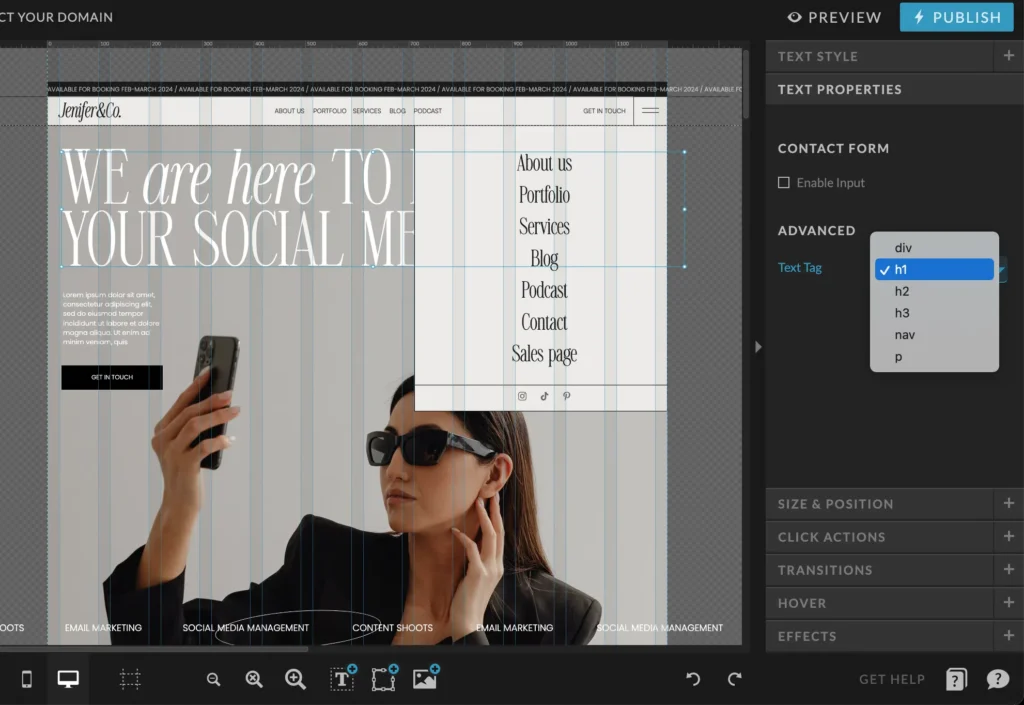
As you’re building your new site, don’t forget about search engine optimization (SEO). Showit makes it easy to optimize your site for SEO with customizable meta tags, alt text for images, and other built-in features. I have a blog post about SEO for Showit sites, which you can find [link here]. Pro tip: Don’t forget to keep at least one H1 (title) on each page!
5) Connect the domain and configure DNS
There’s a tricky part: connecting your domain. Showit provides detailed instructions on how to connect your domain from Squarespace. In short, you need to connect your domain first. To do so, click the ‘Connect Your Domain’ option in the top-left corner of the Design App. After that, you can configure the DNS settings.
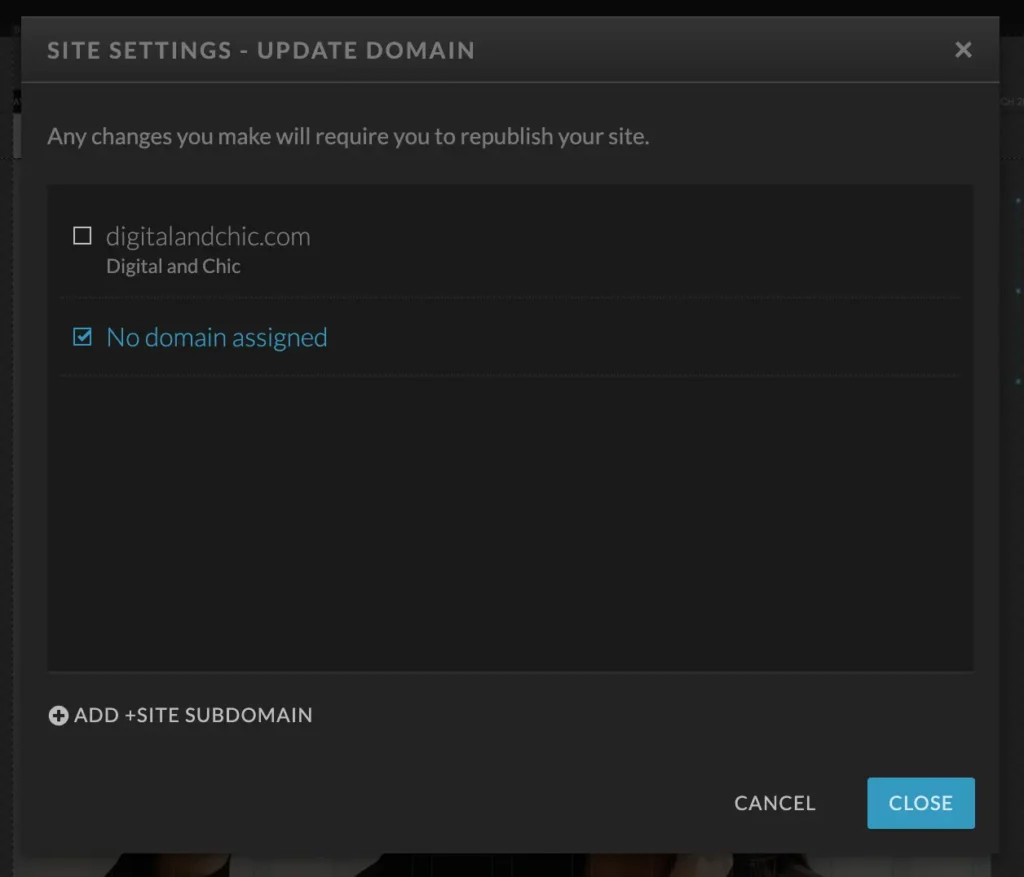
Now, you have two options. First, you can do this automatically (with Entri). If this option is unavailable, you can do it manually.
To manually find your site-specific DNS records, follow these steps:
- Click your name in the lower-left corner of Showit.
- Choose ‘Manage Account.’
- Click ‘Your DNS Records’ below your domain.
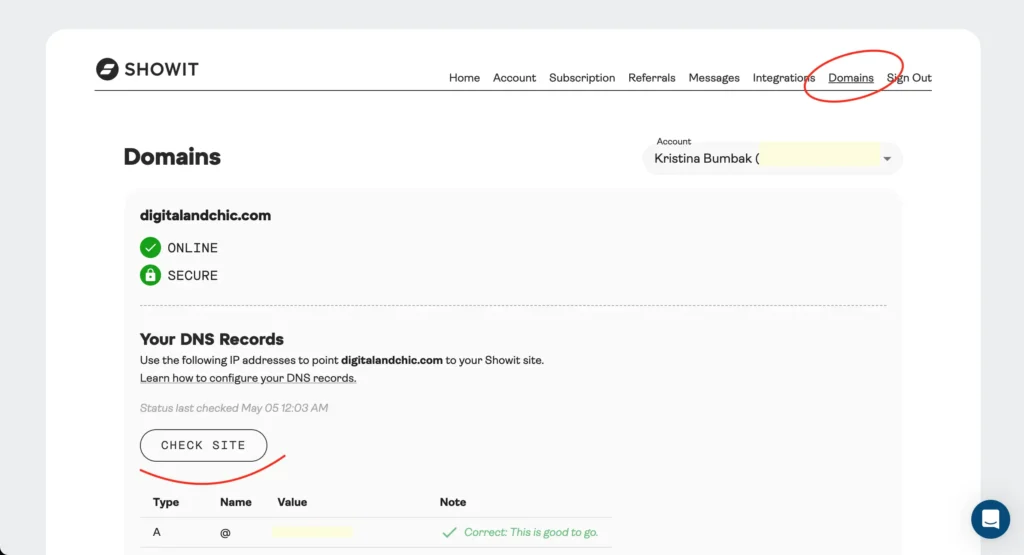
Applying Your DNS Records in Squarespace
You have two options for applying your records in Squarespace: you can work with Squarespace customer support by providing them with the records, or you can do it yourself by following the setup steps from Showit article
6) Don’t forget the SSL
SSL stands for Secure Sockets Layer. (A little lock in the browser corner indicates that your site can be trusted and is safe) After configuring your DNS records with your domain registrar, you’ll need to ensure SSL is set up for your site to guarantee its security. The process for setting up SSL varies depending on your Showit subscription. If your DNS records have been configured correctly, your SSL will be automatically applied to your site. If not, just contact the Showit support team; they will help you for sure!
7) Publish!
Congratulations! Double-check that everything is ready for launch. By the way, you can get a free launch checklist here. Once you’re satisfied with your new Showit site, it’s time to go live! Showit makes this process seamless, enabling you to publish your site with just a few clicks. You’ve done it! Time to celebrate!
Conclusion
Switching from Squarespace to Showit may initially seem like a daunting task, but by following these steps, you can seamlessly transition to a new platform without compromising on design, functionality, or SEO. With Showit’s intuitive interface and powerful features, you’ll have the freedom to create a stunning website that truly reflects your brand. So don’t hesitate – make the switch today and unlock the full potential of your online presence with Showit!

exlpore mroe
Resources
take a look
Find a collection of my favorite tools, resources, and products for your business! From free Showit templates to websites tips. Explore and enjoy!
")
templates shop
shop templates
Easy to use Showit website templates are the perfect option if you are on a tight budget, on a short timeline, or want to customize a website on your own

work with me
work 1:1
With our website design template customization service, you can have a stunning and fully personalized website without the hassle of doing it yourself.
")